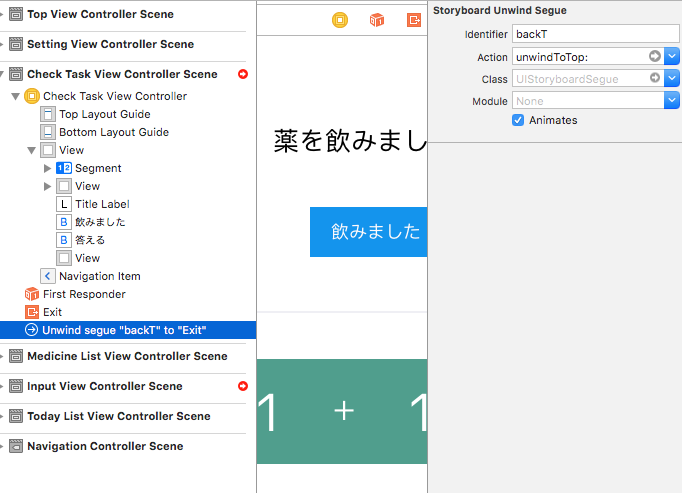
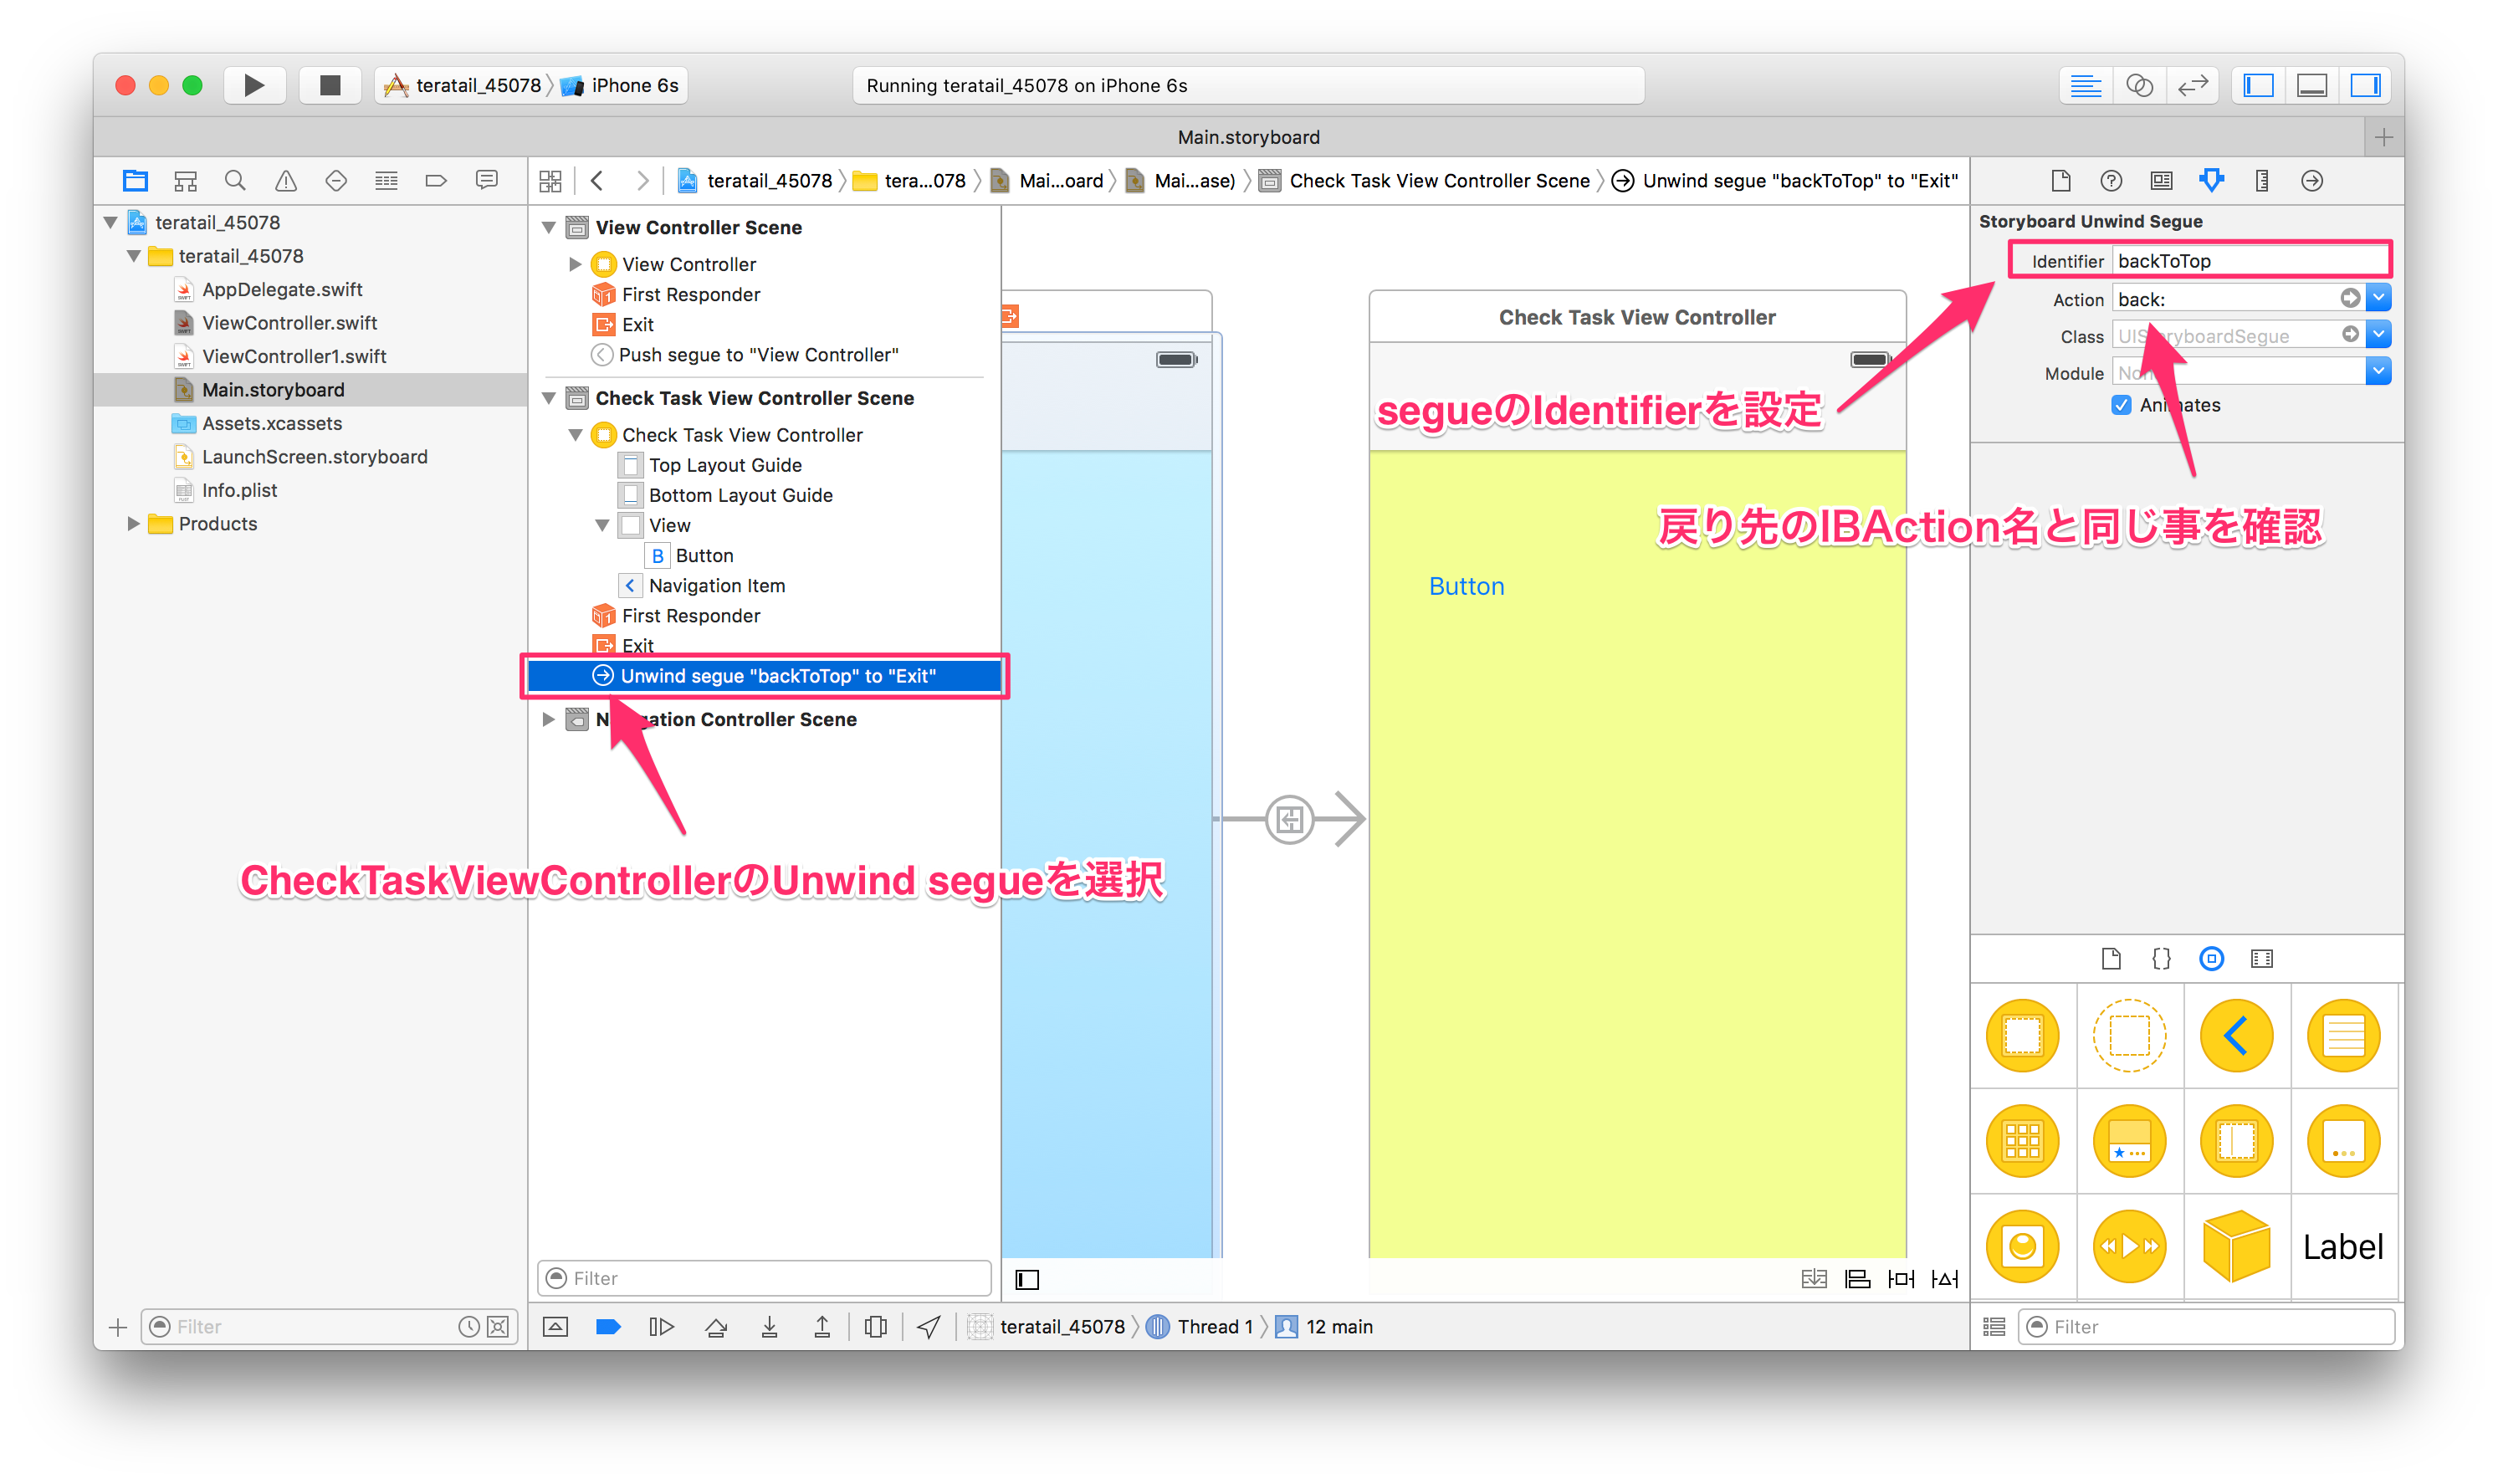
ボタンが押されたら条件によってUnwindするというプログラムを作りたいのですが、segueのIDはあっているのになぜか __Terminating app due to uncaught exception 'NSInvalidArgumentException', reason: 'Receiver (<MedicineChecker.CheckTaskViewController: 0x14fa45290>) has no segue with identifier 'backToTop''__というエラーが出てしまいます。解決方法を知っていたらご回答お願いします。
drink():条件によって遷移
answer():segmentcontrollerが2つめのときにcondition をtrueにする
Swift
1 2import Foundation 3import UIKit 4 5class CheckTaskViewController: UIViewController { 6 var passData: String = "" 7 8 let firstN = 5 9 let secondN = 4 10 let answerN = 9 11 12 var condition = false 13 14 @IBOutlet weak var titleLabel: UILabel! 15 @IBOutlet weak var first: UILabel! 16 @IBOutlet weak var second: UILabel! 17 @IBOutlet weak var segment: UISegmentedControl! 18 19 @IBAction func answer(sender: AnyObject) { 20 if segment.selectedSegmentIndex == 1 { 21 condition = true 22 // ① UIAlertControllerクラスのインスタンスを生成 23 // タイトル, メッセージ, Alertのスタイルを指定する 24 // 第3引数のpreferredStyleでアラートの表示スタイルを指定する 25 let alert: UIAlertController = UIAlertController(title: "正解!", message: "答えは\(answerN)でした", preferredStyle: UIAlertControllerStyle.Alert) 26 27 // ② Actionの設定 28 // Action初期化時にタイトル, スタイル, 押された時に実行されるハンドラを指定する 29 // 第3引数のUIAlertActionStyleでボタンのスタイルを指定する 30 // OKボタン 31 let defaultAction: UIAlertAction = UIAlertAction(title: "OK", style: UIAlertActionStyle.Default, handler:{ 32 // ボタンが押された時の処理を書く(クロージャ実装) 33 (action: UIAlertAction!) -> Void in 34 print("OK") 35 }) 36 // キャンセルボタン 37 38 // ③ UIAlertControllerにActionを追加 39 alert.addAction(defaultAction) 40 41 // ④ Alertを表示 42 presentViewController(alert, animated: true, completion: nil) 43 } else { 44 // ① UIAlertControllerクラスのインスタンスを生成 45 // タイトル, メッセージ, Alertのスタイルを指定する 46 // 第3引数のpreferredStyleでアラートの表示スタイルを指定する 47 let alert: UIAlertController = UIAlertController(title: "はずれ...", message: "答えは\(answerN)でした", preferredStyle: UIAlertControllerStyle.Alert) 48 49 // ② Actionの設定 50 // Action初期化時にタイトル, スタイル, 押された時に実行されるハンドラを指定する 51 // 第3引数のUIAlertActionStyleでボタンのスタイルを指定する 52 // OKボタン 53 let defaultAction: UIAlertAction = UIAlertAction(title: "OK", style: UIAlertActionStyle.Default, handler:{ 54 // ボタンが押された時の処理を書く(クロージャ実装) 55 (action: UIAlertAction!) -> Void in 56 print("OK") 57 }) 58 // キャンセルボタン 59 60 // ③ UIAlertControllerにActionを追加 61 alert.addAction(defaultAction) 62 63 // ④ Alertを表示 64 presentViewController(alert, animated: true, completion: nil) 65 } 66 } 67 68 @IBAction func drink(sender: AnyObject) { 69 if condition == true { 70 NSOperationQueue.mainQueue().addOperationWithBlock { 71 [weak self] in 72 self?.performSegueWithIdentifier("backToTop", sender: self) 73 } 74 print("aa") 75 } else { 76 // ① UIAlertControllerクラスのインスタンスを生成 77 // タイトル, メッセージ, Alertのスタイルを指定する 78 // 第3引数のpreferredStyleでアラートの表示スタイルを指定する 79 let alert: UIAlertController = UIAlertController(title: "注意", message: "問題に答えましょう", preferredStyle: UIAlertControllerStyle.Alert) 80 81 // ② Actionの設定 82 // Action初期化時にタイトル, スタイル, 押された時に実行されるハンドラを指定する 83 // 第3引数のUIAlertActionStyleでボタンのスタイルを指定する 84 // OKボタン 85 let defaultAction: UIAlertAction = UIAlertAction(title: "OK", style: UIAlertActionStyle.Default, handler:{ 86 // ボタンが押された時の処理を書く(クロージャ実装) 87 (action: UIAlertAction!) -> Void in 88 print("OK") 89 }) 90 // キャンセルボタン 91 92 // ③ UIAlertControllerにActionを追加 93 alert.addAction(defaultAction) 94 95 // ④ Alertを表示 96 presentViewController(alert, animated: true, completion: nil) 97 } 98 } 99 100 override func viewDidLoad() { 101 titleLabel.text = passData 102 } 103}


2016/08/22 12:56
2016/08/22 13:04
2016/08/22 13:09
2016/08/22 13:27 編集
2016/08/22 14:07