StackOverflow の下記の質疑
そのままですが、こんな感じでいけるかと思います。
原理の説明については原文に詳しく記述してありますし、xib ではなくてカスタムセルを使うのであれば二番目の方法もありますので、そちらも併せて参考にしていただければと思います。
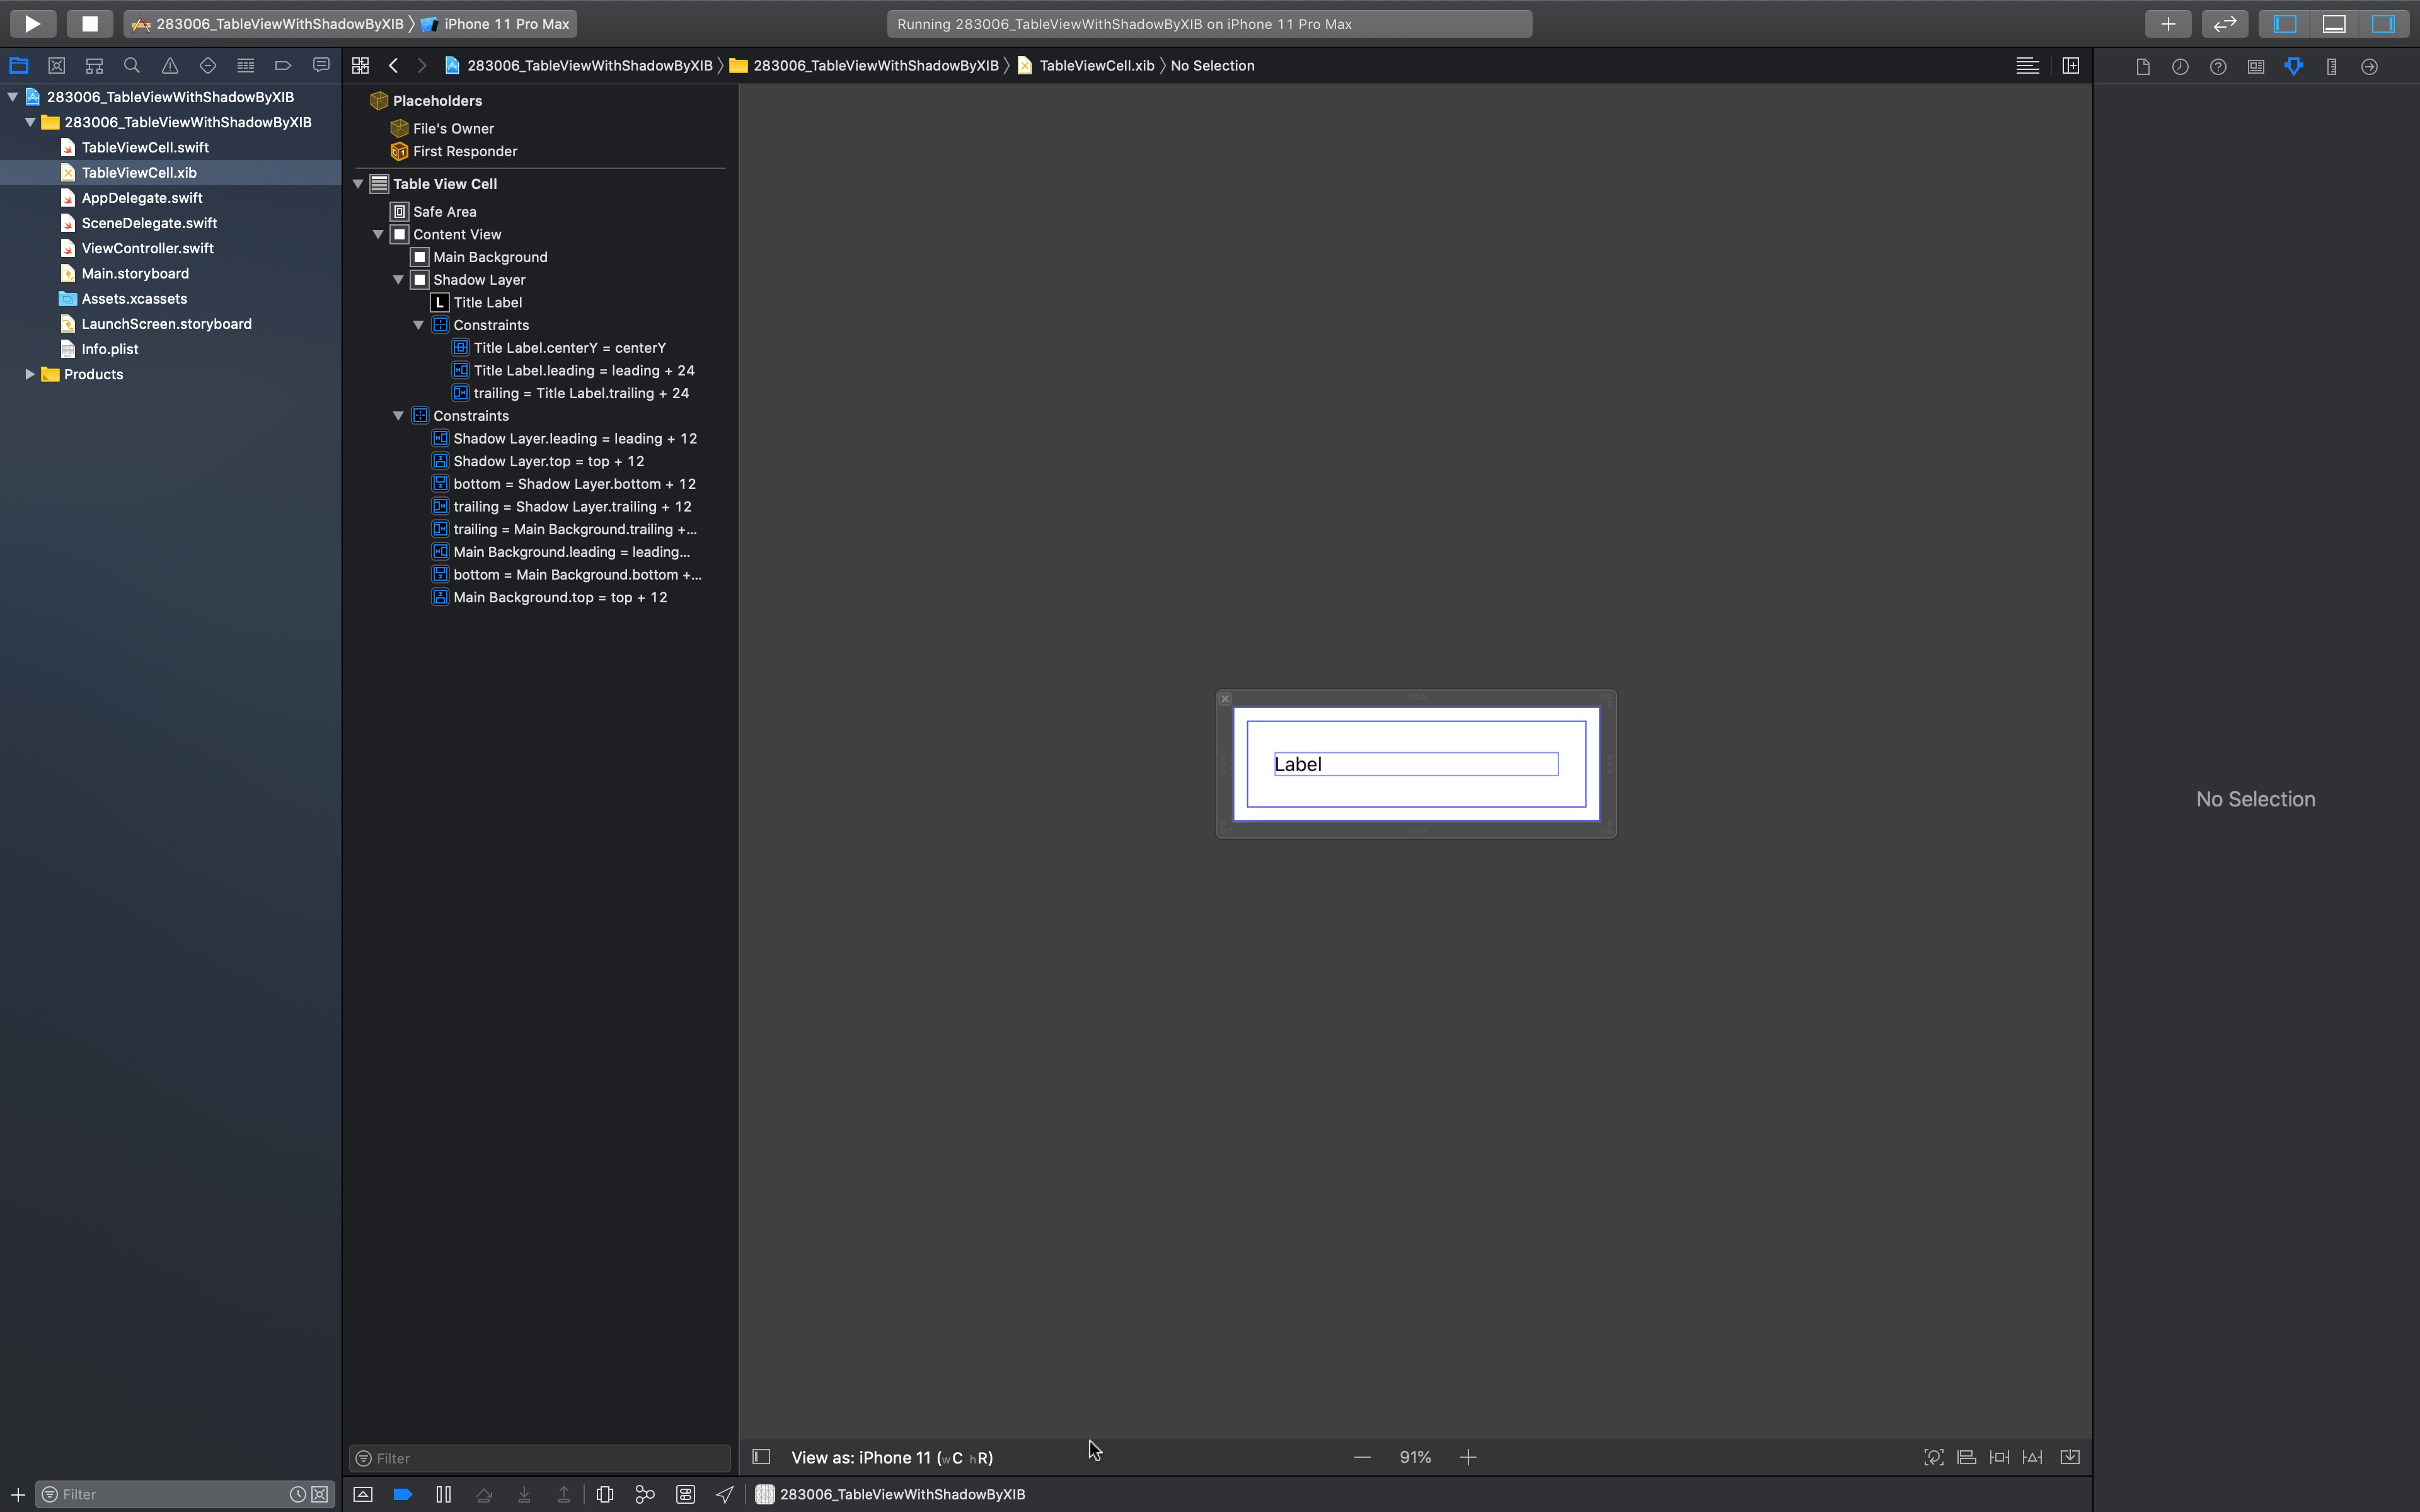
1. Cell の中に UIView を配置します。ここでは mainBackground とします。制約は Superview に対して上下左右12で付けました(制約については調節してみてもらえますでしょうか)。
2. 別の UIVew を 1. の上に全く同じ制約で配置します。名前は shadowLayer とします。この UIVew は後ほどカスタムクラスに変更するのですが、とりあえずは UIVew のままにしておきます。
3. セルの生成については次のような感じにします。
Swift
1 func tableView(_ tableView: UITableView, cellForRowAt indexPath: IndexPath) -> UITableViewCell {
2 let cell = tableView.dequeueReusableCell(withIdentifier: "Cell", for: indexPath) as! TableViewCell
3 cell.titleLabel.text = "Cell"
4
5 cell.mainBackground.layer.cornerRadius = 8
6 cell.mainBackground.layer.masksToBounds = true
7 cell.backgroundColor = .systemGray6
8
9 return cell
10 }
4. 適切なファイルで、UIView のサブクラスを作ります。
Swift
1class ShadowView: UIView {
2 override var bounds: CGRect {
3 didSet {
4 setupShadow()
5 }
6 }
7
8 private func setupShadow() {
9 self.layer.cornerRadius = 8
10 self.layer.shadowOffset = CGSize(width: 0, height: 0)
11 self.layer.shadowRadius = 3
12 self.layer.shadowOpacity = 0.3
13 self.layer.shadowPath = UIBezierPath(roundedRect: self.bounds, byRoundingCorners: .allCorners, cornerRadii: CGSize(width: 8, height: 8)).cgPath
14 self.layer.shouldRasterize = true
15 self.layer.rasterizationScale = UIScreen.main.scale
16 }
17}
5. xib ファイルを編集し、shadowLayer のカスタムクラスを ShadowView に変更します。
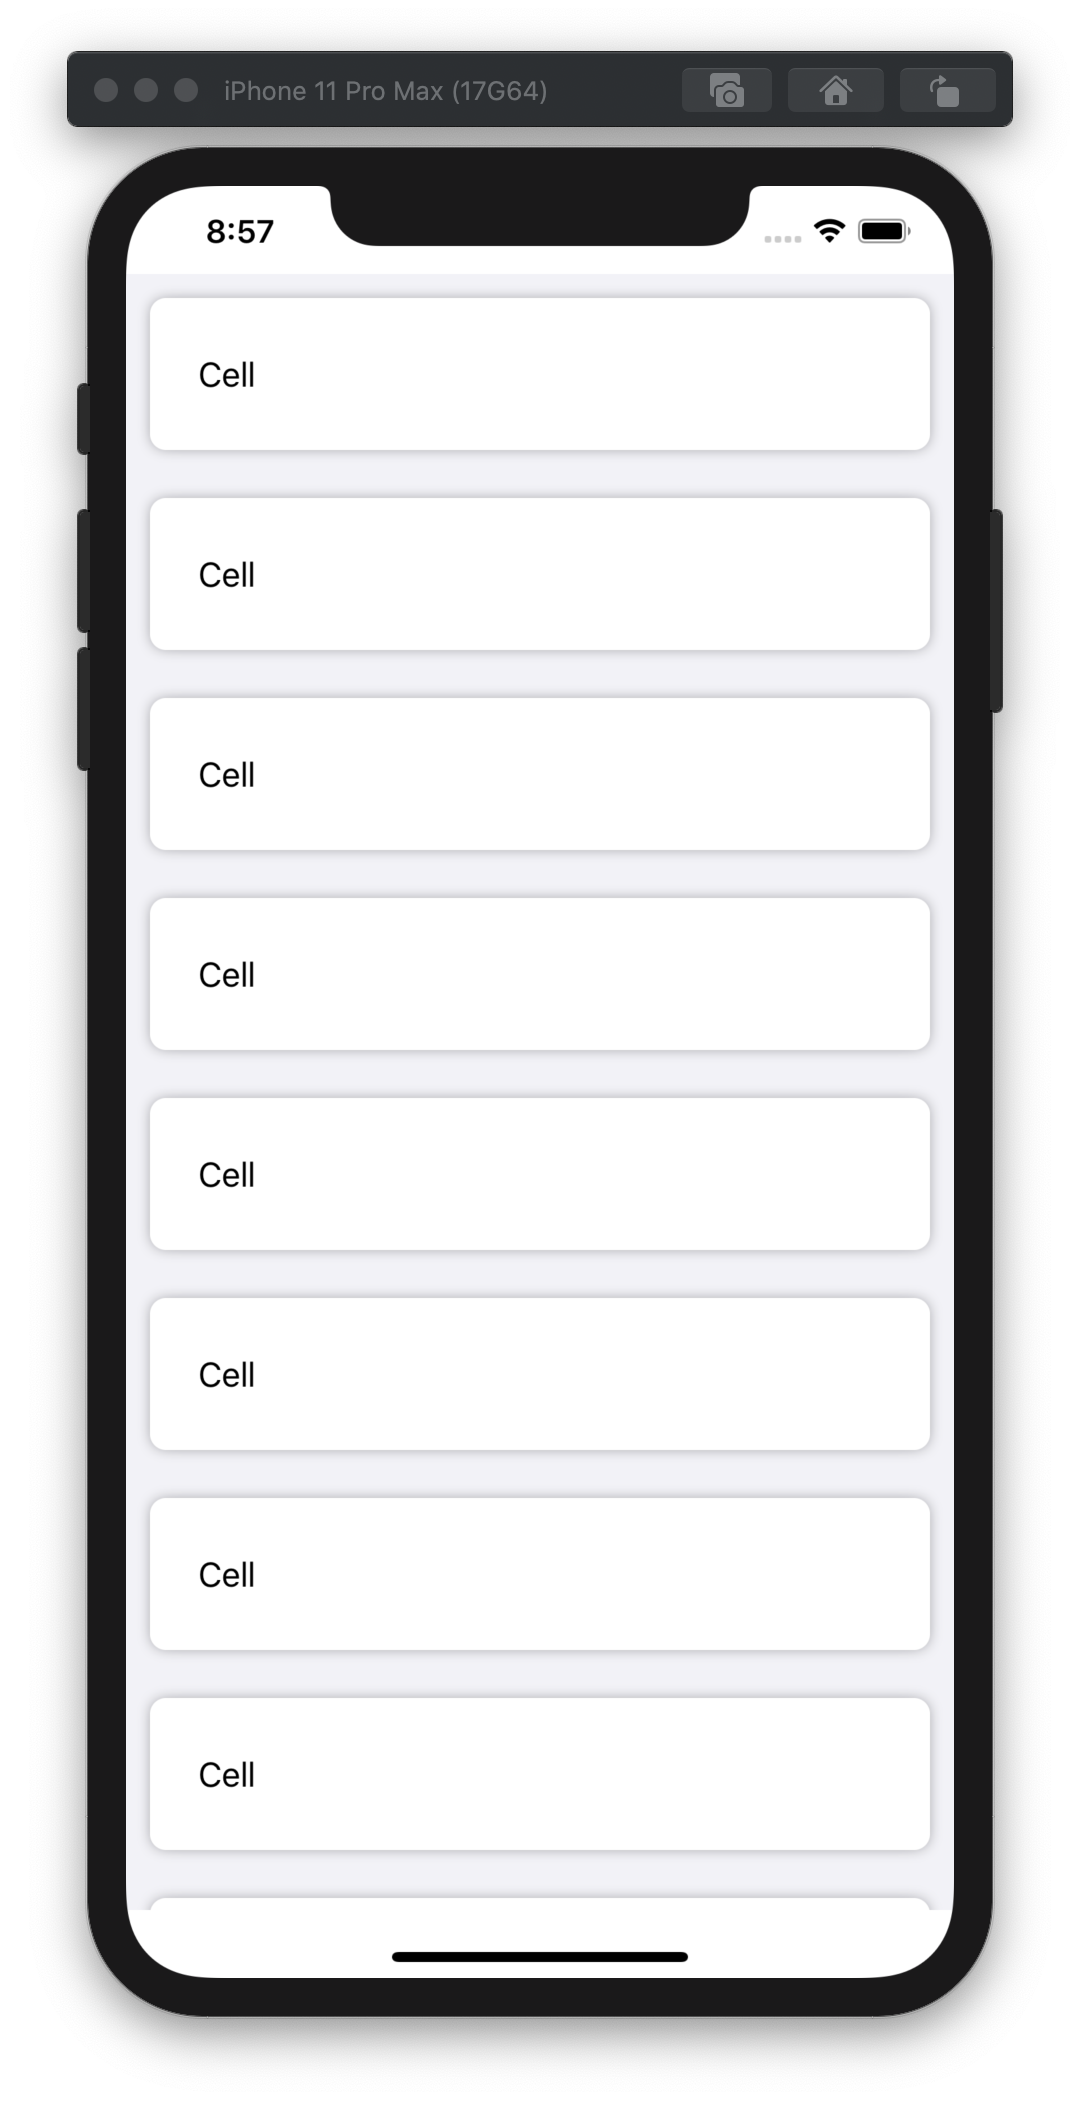
基本的に上記の作業を行えば、下記のような角丸・影付きのセルを作ることができるようです。
参考までに ViewController.swift を載せておきます。カスタムセルについては、Outlet を設定したこと以外コードには一切手を加えていませんのでここでは省略したいと思います。
Swift
1import UIKit
2
3class ViewController: UIViewController, UITableViewDelegate, UITableViewDataSource {
4
5 @IBOutlet weak var table: UITableView!
6
7 override func viewDidLoad() {
8 super.viewDidLoad()
9 // Do any additional setup after loading the view.
10 table.delegate = self
11 table.dataSource = self
12 table.separatorStyle = .none
13
14 table.register(UINib(nibName: "TableViewCell", bundle: nil), forCellReuseIdentifier: "Cell")
15 }
16
17 func tableView(_ tableView: UITableView, numberOfRowsInSection section: Int) -> Int {
18 return 10
19 }
20
21 func tableView(_ tableView: UITableView, cellForRowAt indexPath: IndexPath) -> UITableViewCell {
22 let cell = tableView.dequeueReusableCell(withIdentifier: "Cell", for: indexPath) as! TableViewCell
23 cell.titleLabel.text = "Cell"
24
25 cell.mainBackground.layer.cornerRadius = 8
26 cell.mainBackground.layer.masksToBounds = true
27 cell.backgroundColor = .systemGray6
28
29 return cell
30 }
31
32 func tableView(_ tableView: UITableView, heightForRowAt indexPath: IndexPath) -> CGFloat {
33 return 100
34 }
35}
36
37class ShadowView: UIView {
38 override var bounds: CGRect {
39 didSet {
40 setupShadow()
41 }
42 }
43
44 private func setupShadow() {
45 self.layer.cornerRadius = 8
46 self.layer.shadowOffset = CGSize(width: 0, height: 0)
47 self.layer.shadowRadius = 3
48 self.layer.shadowOpacity = 0.3
49 self.layer.shadowPath = UIBezierPath(roundedRect: self.bounds, byRoundingCorners: .allCorners, cornerRadii: CGSize(width: 8, height: 8)).cgPath
50 self.layer.shouldRasterize = true
51 self.layer.rasterizationScale = UIScreen.main.scale
52 }
53}


