メニュープロバイダを使って、メニューを該当フラグメントで定義するだけです。(以下の BetaFragment)
MainActivity.java
java
1import androidx.appcompat.app.AppCompatActivity;
2import androidx.appcompat.widget.Toolbar;
3import androidx.fragment.app.FragmentManager;
4
5import android.os.Bundle;
6
7public class MainActivity extends AppCompatActivity {
8 @Override
9 protected void onCreate(Bundle savedInstanceState) {
10 super.onCreate(savedInstanceState);
11 setContentView(R.layout.activity_main);
12
13 Toolbar toolbar = findViewById(R.id.toolbar);
14 setSupportActionBar(toolbar);
15
16 FragmentManager fm = getSupportFragmentManager();
17
18 //ナビゲーションの代わり
19 fm.setFragmentResultListener("toAlpha", this, (requestKey, result) -> {
20 fm.beginTransaction()
21 .replace(R.id.fragment_container_view, new AlphaFragment())
22 .commit();
23 });
24 fm.setFragmentResultListener("toBeta", this, (requestKey, result) -> {
25 fm.beginTransaction()
26 .replace(R.id.fragment_container_view, new BetaFragment())
27 .commit();
28 });
29
30 if(savedInstanceState == null) {
31 fm.beginTransaction()
32 .replace(R.id.fragment_container_view, new AlphaFragment())
33 .commit();
34 }
35 }
36}
res/layout/activity_main.xml
xml
1<?xml version="1.0" encoding="utf-8"?>
2<androidx.constraintlayout.widget.ConstraintLayout xmlns:android="http://schemas.android.com/apk/res/android"
3 xmlns:app="http://schemas.android.com/apk/res-auto"
4 android:layout_width="match_parent"
5 android:layout_height="match_parent">
6
7 <androidx.appcompat.widget.Toolbar
8 android:id="@+id/toolbar"
9 android:layout_width="match_parent"
10 android:layout_height="wrap_content"
11 android:background="?attr/colorPrimary"
12 android:minHeight="?attr/actionBarSize"
13 android:theme="?attr/actionBarTheme"
14 app:layout_constraintEnd_toEndOf="parent"
15 app:layout_constraintStart_toStartOf="parent"
16 app:layout_constraintTop_toTopOf="parent" />
17
18 <androidx.fragment.app.FragmentContainerView
19 android:id="@+id/fragment_container_view"
20 android:layout_width="0dp"
21 android:layout_height="0dp"
22 app:layout_constraintBottom_toBottomOf="parent"
23 app:layout_constraintEnd_toEndOf="parent"
24 app:layout_constraintStart_toStartOf="parent"
25 app:layout_constraintTop_toBottomOf="@id/toolbar" />
26</androidx.constraintlayout.widget.ConstraintLayout>
AlphaFragment.java
java
1import android.os.Bundle;
2import android.view.View;
3import android.widget.Button;
4
5import androidx.annotation.*;
6import androidx.fragment.app.Fragment;
7
8public class AlphaFragment extends Fragment {
9 AlphaFragment() {
10 super(R.layout.fragment_alpha);
11 }
12
13 @Override
14 public void onViewCreated(@NonNull View view, @Nullable Bundle savedInstanceState) {
15 super.onViewCreated(view, savedInstanceState);
16
17 Button toBetaButton = view.findViewById(R.id.toBetaButon);
18 toBetaButton.setOnClickListener(v -> getParentFragmentManager().setFragmentResult("toBeta", null));
19 }
20}
res/layout/fragment_alpha.xml
xml
1<?xml version="1.0" encoding="utf-8"?>
2<androidx.constraintlayout.widget.ConstraintLayout xmlns:android="http://schemas.android.com/apk/res/android"
3 xmlns:app="http://schemas.android.com/apk/res-auto"
4 android:layout_width="match_parent"
5 android:layout_height="match_parent"
6 android:background="#ffc0ff">
7
8 <TextView
9 android:id="@+id/textView"
10 android:layout_width="wrap_content"
11 android:layout_height="wrap_content"
12 android:text="Alpha"
13 android:textSize="30dp"
14 app:layout_constraintBottom_toTopOf="@id/toBetaButon"
15 app:layout_constraintEnd_toEndOf="parent"
16 app:layout_constraintStart_toStartOf="parent"
17 app:layout_constraintTop_toTopOf="parent" />
18 <Button
19 android:id="@+id/toBetaButon"
20 android:layout_width="wrap_content"
21 android:layout_height="wrap_content"
22 android:text="to Beta"
23 android:textSize="30dp"
24 app:layout_constraintBottom_toBottomOf="parent"
25 app:layout_constraintEnd_toEndOf="parent"
26 app:layout_constraintStart_toStartOf="parent"
27 app:layout_constraintTop_toBottomOf="@id/textView" />
28</androidx.constraintlayout.widget.ConstraintLayout>
BetaFragment.java
java
1import android.os.Bundle;
2import android.util.Log;
3import android.view.*;
4import android.widget.Button;
5
6import androidx.annotation.*;
7import androidx.core.view.*;
8import androidx.fragment.app.Fragment;
9import androidx.lifecycle.Lifecycle;
10
11public class BetaFragment extends Fragment {
12 private static final String LOG_TAG = "BetaFragment";
13
14 BetaFragment() {
15 super(R.layout.fragment_beta);
16 }
17 @Override
18 public void onViewCreated(@NonNull View view, @Nullable Bundle savedInstanceState) {
19 super.onViewCreated(view, savedInstanceState);
20
21 Button toAlphaButton = view.findViewById(R.id.toAlphaButon);
22 toAlphaButton.setOnClickListener(v -> getParentFragmentManager().setFragmentResult("toAlpha", null));
23
24 requireActivity().addMenuProvider(new MenuProvider() {
25 @Override
26 public void onCreateMenu(@NonNull Menu menu, @NonNull MenuInflater menuInflater) {
27 menuInflater.inflate(R.menu.menu, menu);
28 }
29 @Override
30 public boolean onMenuItemSelected(@NonNull MenuItem menuItem) {
31 Log.d(LOG_TAG, "onMenuItemSelected: menuItem="+menuItem);
32 return true;
33 }
34 }, getViewLifecycleOwner(), Lifecycle.State.RESUMED);
35 }
36}
res/layout/fragment_beta.xml
xml
1<?xml version="1.0" encoding="utf-8"?>
2<androidx.constraintlayout.widget.ConstraintLayout xmlns:android="http://schemas.android.com/apk/res/android"
3 xmlns:app="http://schemas.android.com/apk/res-auto"
4 android:layout_width="match_parent"
5 android:layout_height="match_parent"
6 android:background="#c0ffff">
7
8 <TextView
9 android:id="@+id/textView"
10 android:layout_width="wrap_content"
11 android:layout_height="wrap_content"
12 android:text="Beta"
13 android:textSize="30dp"
14 app:layout_constraintBottom_toTopOf="@id/toAlphaButon"
15 app:layout_constraintEnd_toEndOf="parent"
16 app:layout_constraintStart_toStartOf="parent"
17 app:layout_constraintTop_toTopOf="parent" />
18 <Button
19 android:id="@+id/toAlphaButon"
20 android:layout_width="wrap_content"
21 android:layout_height="wrap_content"
22 android:text="to Alpha"
23 android:textSize="30dp"
24 app:layout_constraintBottom_toBottomOf="parent"
25 app:layout_constraintEnd_toEndOf="parent"
26 app:layout_constraintStart_toStartOf="parent"
27 app:layout_constraintTop_toBottomOf="@id/textView" />
28</androidx.constraintlayout.widget.ConstraintLayout>
res/menu/menu.xml
xml
1<?xml version="1.0" encoding="utf-8"?>
2<menu xmlns:android="http://schemas.android.com/apk/res/android"
3 xmlns:app="http://schemas.android.com/apk/res-auto">
4 <item android:id="@+id/menu"
5 android:icon="@android:drawable/ic_menu_delete"
6 app:showAsAction="ifRoom"
7 android:title="削除" />
8</menu>
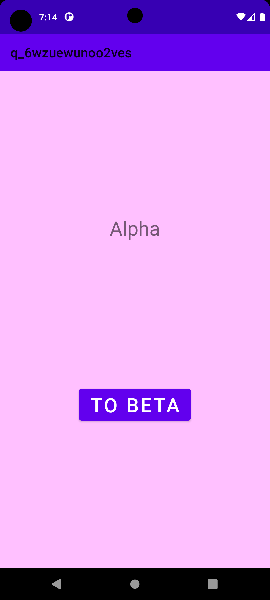
Alpha画面(メニュー無し)
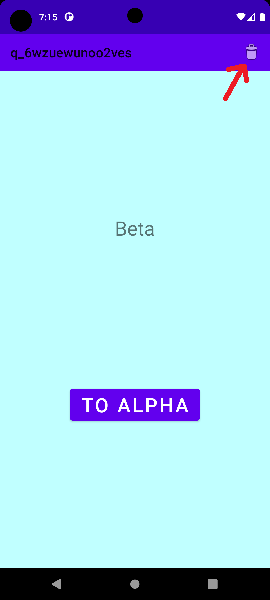
Beta画面(メニュー有り)
メニュークリック時ログ
D/BetaFragment: onMenuItemSelected: menuItem=削除


2023/03/17 09:03
2023/03/17 10:03